
How Cleveland Weather Affects Appliances
Published: August 17, 2026
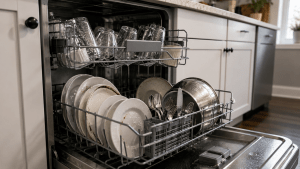
You open the dishwasher expecting warm plates, sparkling glasses, and clean silverware. Instead, you find cloudy cups, greasy bowls, food stuck to the forks, and enough water sitting on top of the mugs to fill a small birdbath. Sound familiar? For many Cleveland homeowners, a dishwasher that leaves dishes wet, dirty, or both feels like a failing appliance, but the machine itself is not always the real problem. Loading habits, water temperature, clogged filters, weak spray patterns, mineral deposits, drainage trouble, and detergent mistakes can all produce nearly identical symptoms.
The frustrating part is that several small issues often overlap. Maybe the water is not hot enough, the filter is coated with grease, and a tall cutting board is preventing the detergent door from opening completely. Each problem seems minor on its own, yet together they can turn a normal wash cycle into a disappointing mess. That is why randomly replacing parts or pouring in extra detergent rarely works. You need to approach the dishwasher like a system, not a mysterious metal box under the counter.
Cleveland homes also vary widely in age, plumbing layout, water-heater distance, pipe condition, and kitchen design. A dishwasher in a newer townhouse may behave differently from one installed in an older home with long plumbing runs and aging shutoff valves. If your home has older plumbing or other age-related appliance concerns, our guide to appliance problems in older Cleveland homes explains why these conditions can affect appliance performance. Seasonal temperature changes can also influence how quickly hot water reaches the kitchen. None of that means you are stuck hand-drying every plate or washing each load twice.
Most dishwasher performance problems can be narrowed down through a careful series of checks. The trick is knowing what to inspect first, what you can safely clean yourself, and when the symptoms point to a deeper mechanical failure that may require dishwasher repair. This guide walks through the most common reasons dishes stay wet or dirty and gives Cleveland homeowners a practical way to fix the problem without wasting time, detergent, water, or money.
Wet dishes and dirty dishes may look like separate complaints, but they often come from the same underlying condition: poor water movement. A dishwasher relies on hot water being sprayed forcefully across every surface, then draining away so the drying process can begin. When circulation is weak, water cannot remove food and grease effectively. The remaining dirty water may then collect on cups, bowls, utensils, and plastic containers, leaving everything both unclean and damp at the end of the cycle.
Imagine trying to wash a muddy car with a garden hose that barely produces a trickle. You could stand there all afternoon, but the weak stream would never carry away the dirt. A dishwasher works on the same principle. Its pump sends water through rotating spray arms, and those arms distribute the water throughout the tub. If filters are blocked, spray holes are clogged, the pump is struggling, or large dishes are interfering with rotation, the cleaning action becomes uneven. Some dishes may look fine while others appear untouched.
Drying depends on successful washing and draining. When food residue, detergent foam, or greasy water remains inside the machine, moisture clings more easily to dish surfaces. The dishwasher may technically complete its drying stage, but it is working against a dirty, humid environment. Plastic items tend to stay especially wet because they do not retain heat as well as glass, ceramic, or metal. That does not automatically indicate a defect, but excessive water on every item suggests something else is wrong.
Start by observing the entire load rather than focusing on one wet cup or one dirty plate. Are the dishes on the top rack dirtier than those below? Is water collecting only in concave items? Does the dishwasher smell unpleasant after the cycle? Are there gritty particles on glasses or greasy streaks on plates? These patterns provide useful clues. A dishwasher that leaves everything equally dirty may have a water, pump, detergent, or temperature issue, while uneven cleaning often points to loading, spray-arm obstruction, or a localized clog.
Before you remove a filter or reach for a screwdriver, take a close look at how you load the machine. Improper loading is one of the most common reasons a dishwasher underperforms, and it costs nothing to correct. Many homeowners treat the racks like storage shelves and squeeze in as many items as possible. That seems efficient, but a dishwasher cannot clean surfaces that water cannot reach. Every plate, cup, bowl, and utensil needs exposure to the spray.
Place plates so their dirty surfaces face the center or the main spray direction. Bowls should be angled downward rather than stacked tightly together. Cups and glasses belong upside down or at a slight angle so water can drain instead of pooling in their bottoms. Large cookware should not form a wall that blocks water from reaching the upper rack. If a pan or cutting board prevents the detergent dispenser from opening, the entire cycle may run with little or no detergent circulating through the machine.
Utensils need space too. When spoons nest together, their curved surfaces create a seal that water cannot penetrate. Mix spoons, forks, and knives so they do not rest in identical groups. Keep safety in mind when placing sharp items, and follow the basket design rather than forcing oversized utensils into narrow openings. Long tools should lie flat only when they cannot fall through the rack and interfere with a spray arm.
Do a quick rotation test before starting the cycle. Reach inside and gently spin each accessible spray arm. It should move freely without striking plates, handles, utensils, or cookware. A single pan handle hanging too low can stop an arm from rotating during the entire wash. The machine will still make noise, fill, drain, and appear to operate normally, but half the load may remain dirty.
Good loading is less about creating a perfect arrangement and more about leaving pathways. Think of water like traffic. If every route is blocked, nothing gets where it needs to go. A slightly smaller, properly arranged load will usually come out cleaner and drier than an overloaded machine packed to the ceiling.

Overloading creates more than a cleaning problem. It also traps moisture, blocks airflow, and prevents hot surfaces from drying evenly. When dishes are packed tightly together, they create narrow pockets where water collects and steam cannot escape. That is why a crowded load may finish with wet plates pressed against one another, damp utensils, and puddles sitting between nested bowls. The machine may have completed a normal cycle, but the load itself prevented the drying process from working.
Large items cause the biggest trouble. Baking sheets, oversized pans, mixing bowls, cutting boards, and serving platters can redirect spray away from the rest of the load. A tall item placed near the front may block the detergent dispenser. A deep pot positioned upright may collect dirty wash water like a bucket. A pan placed flat across the lower rack can shield everything beneath or above it. These items often need more space than homeowners expect, and sometimes they are better washed separately.
Overloading can also interfere with the dishwasher’s sensors. Some machines estimate soil level, temperature, or cycle conditions based on water movement and clarity. When food debris remains trapped between crowded dishes, the appliance may not respond as expected. Detergent can become concentrated in one area while other parts of the load receive mostly water. The result is an odd combination of chalky residue, greasy surfaces, and wet dishes.
There is a simple test: remove about one-quarter of your usual load and run the dishwasher again. Do not change the detergent, cycle, or water temperature. If the smaller load comes out noticeably cleaner and drier, the machine may be fine. Your normal loading pattern is likely restricting circulation.
This does not mean you must run half-empty loads every day. It means each item needs a little breathing room. Plates should not touch face-to-face. Bowls should not nest. Cups should not sit on top of one another. Large cookware should be positioned so it does not block spray or drainage. A dishwasher is a washing machine, not a kitchen cabinet. Give the water room to move, and the results often improve immediately.
The angle of a dish can determine whether it leaves the machine spotless or filled with murky water. Dishwashers clean through moving water, gravity, heat, and drainage. When an item is positioned against those forces, it becomes harder to wash and almost impossible to dry. A cup placed completely flat may trap water on its base. A bowl facing upward will collect wash water. A plastic lid caught between rack wires may flip over during the cycle and become a miniature swimming pool.
Place glasses and mugs at a slight downward angle whenever the rack allows it. This helps water run off rather than gathering on recessed bottoms. Bowls should face down and toward the strongest spray area. Deep containers may need more tilt than shallow ones. Plastic food-storage pieces often require extra attention because they are lightweight and can move during washing. Secure them in a section where they will not flip or fall onto a heating area.
Avoid placing delicate glassware directly beside heavy pots or utensils. Water pressure can cause items to shift, and contact between them may create chips or cracks. Keep tall objects away from moving spray arms and overhead mechanisms. When loading the upper rack, check whether stemware, utensils, or bottle-shaped items extend too far downward. When loading the bottom rack, make sure pan handles and tall plates do not interfere with the upper spray system.
Dish placement also affects drying because different materials hold heat differently. Ceramic plates, glass bowls, and metal utensils usually become hot during the wash and release that heat slowly, helping water evaporate. Plastic cools quickly, so droplets remain on the surface. Tilting plastic pieces gives those droplets somewhere to go. Even a perfectly functioning dishwasher may leave some plastic damp, but proper placement can reduce the amount significantly.
Pay attention to which surfaces remain dirty. Food left inside bowls may indicate poor angle or blocked spray. Residue on the outside of glasses may suggest crowding. Water sitting on cup bottoms usually points to placement rather than a mechanical failure. Once you start reading these patterns, loading becomes less like guesswork and more like arranging small targets for moving water.
Dishwashers need sufficiently hot water to dissolve detergent, loosen grease, break down food residue, and support effective drying. When incoming water is too cool, the machine may run a complete cycle without delivering a truly clean load. Greasy plates stay cloudy, detergent remains partially dissolved, and dishes feel cool and wet when the door opens. Cleveland homeowners may notice this more during colder months, especially when the kitchen sits far from the water heater or hot water must travel through long pipe runs.
Before starting the dishwasher, turn on the kitchen faucet and let the water run until it becomes hot. This clears cooler water sitting in the line so the dishwasher begins with a warmer supply. It is a simple habit, but it can make a noticeable difference, particularly in older homes where hot water takes time to reach the kitchen. You do not need to waste gallons. Run the faucet only until the temperature stabilizes.
If the water never becomes properly hot, the dishwasher may not be the problem. Check whether the water heater is operating normally and whether other fixtures receive adequate hot water. A low household temperature setting, failing heating component, plumbing restriction, or mixing issue can affect the entire home. Be cautious when adjusting water-heater settings, because excessively hot water creates a scalding risk. The goal is reliable hot water, not dangerously high temperatures.
Some dishwashers heat water internally, but that does not mean incoming temperature is irrelevant. Starting with very cold water can lengthen cycles and place more demand on the internal heating system. If that system is weak or failing, the load may never reach the conditions needed for good washing and drying.
Observe the machine at the end of the wash stage. Are dishes warm or hot? Does steam escape when the door is opened shortly after completion? If everything remains cool, the dishwasher may not be heating as expected. Combine that symptom with poor cleaning, undissolved detergent, or weak drying, and you have a stronger reason to investigate the heating circuit or consider professional dishwasher repair.

A dirty dishwasher filter can create an impressive number of problems. It can leave food particles on clean-looking glasses, cause unpleasant odors, slow drainage, reduce water circulation, and make the entire machine seem weaker than it really is. Yet many homeowners do not realize their dishwasher has a filter that requires regular cleaning. Because it sits at the bottom of the tub, beneath the lower rack or spray area, it stays out of sight until performance drops.
Turn off the machine and allow it to cool before inspecting the filter area. Remove the lower rack and look for a cylindrical, flat, or screen-like component near the bottom. The exact design varies, so avoid forcing anything that does not release easily. Once removed, rinse the filter under warm water. Use a soft brush to loosen greasy film and trapped particles. Sharp tools can damage the screen, creating openings that allow debris to circulate through the pump and spray system.
The filter may contain more than food. Small pieces of paper, broken glass, labels, fruit seeds, bones, plastic fragments, and hardened detergent can collect there. Wear protective gloves and inspect carefully rather than reaching blindly into standing water. If you find glass, remove it cautiously and check the surrounding area for additional pieces.
Clean the filter housing as well. Wipe away sludge, grease, and debris from accessible surfaces, but do not push dirt deeper into the drain opening. Reinstall the filter securely. A loose or incorrectly seated filter can allow food particles to recirculate, which may make the next load look worse.
After cleaning, run an empty rinse or wash cycle and listen to the machine. Water should move freely, and drainage should sound steady rather than strained. Then test a normal load without overfilling the racks. If cleaning performance improves, the filter was likely restricting circulation.
Filter maintenance is one of the highest-value dishwasher habits because it requires little time and no specialized equipment. How often you clean it depends on use, food residue, and the machine’s design. A household that runs daily loads may need more frequent attention than someone who uses the dishwasher only a few times each week.

The spray arms are the dishwasher’s delivery system. They spin as water shoots through small openings, creating the pressure and coverage needed to clean every rack. When those openings become clogged with food particles, mineral deposits, bits of labels, or detergent residue, the spray pattern weakens. One section of the dishwasher may receive plenty of water while another receives almost none. This often explains why dishes on one rack come out clean while items in another area remain dirty.
Remove the racks as needed and gently spin each spray arm by hand. It should rotate freely without catching on the tub, rack, or nearby components. Check for cracks, loose connections, warping, or splitting along the seams. A damaged arm can leak pressure before water reaches the spray holes. Even if it continues spinning, the cleaning force may be too weak.
Look closely at each opening. If you see white crust, food debris, or other material, clean the holes using a soft brush, wooden toothpick, or another non-damaging tool. Avoid metal objects that could enlarge or scratch the openings. If the spray arm can be removed safely according to its locking design, rinse it thoroughly and shake it. A rattling sound may indicate debris trapped inside.
Do not overlook the water connection where the arm attaches. Grease and residue can build up around the joint, preventing smooth rotation or creating a poor seal. Clean accessible surfaces and reinstall the arm firmly. It should not wobble excessively or bind when turned.
You can also perform a basic movement test. Position the spray arms in a specific direction, run the dishwasher briefly, then stop the cycle safely and check whether they changed position. If an arm remains exactly where you left it, something may be preventing rotation. This is not a complete diagnosis, but it provides a useful clue.
Repeated spray-arm clogs may point to a dirty filter, deteriorating rack components, heavy mineral buildup, or food being left on dishes in large amounts. Fix the source, not just the holes, or the problem will return.
More detergent does not automatically mean cleaner dishes. In fact, using too much can create cloudy glassware, gritty residue, excess foam, poor rinsing, and wet surfaces coated with a thin film. Using too little creates the opposite problem: grease remains on plates, food does not break down, and the wash water becomes dirty quickly. The right amount depends on the load, water conditions, cycle type, and detergent form, but the goal is always balanced cleaning rather than filling every dispenser to the top.
Old detergent can also fail. Powder may absorb moisture and form hard clumps. Premeasured products can deteriorate when stored in humid areas or handled with wet hands. Liquid products may thicken or separate over time. Keep detergent sealed, dry, and away from heat. A cabinet directly beside a warm dishwasher or damp sink area may not be the best storage location.
Check the dispenser before each cycle. It should be clean, dry, and able to open freely. A tall pan, cutting board, or utensil can block the door. Sticky detergent residue may cause the latch to hang up. If the dispenser remains closed after the cycle, do not assume the detergent was defective. Inspect the mechanism and loading arrangement first.
The soil level matters too. Heavily soiled cookware may need a stronger cycle, but that does not mean adding a mountain of detergent. Scrape off bones, large food pieces, toothpicks, labels, and thick leftovers before loading. You generally do not need to scrub every plate spotless, because modern wash cycles are designed to handle ordinary food residue. However, the dishwasher is not a garbage disposal for whole pieces of food.
If dishes come out chalky, reduce the detergent slightly and improve rinsing conditions. If they remain greasy, confirm water temperature, spray action, filter cleanliness, and detergent freshness before simply adding more. Detergent works as part of the system. When water is too cool or circulation is weak, extra soap often leaves extra residue rather than extra cleanliness.
Rinse aid is often misunderstood. It does not wash dishes, replace detergent, or repair a broken drying system. Its job is to help water spread into a thin sheet and slide off surfaces more easily instead of forming stubborn droplets. That matters because fewer droplets mean fewer water spots, less pooling, and better drying. Glassware often looks clearer, and plastic items may carry less water when the cycle ends.
Without rinse aid, water tends to bead on plates, glasses, stainless utensils, and plastic containers. Those beads can remain long after the heating or drying stage ends. They may leave cloudy spots as minerals dry on the surface. In a heavily loaded machine, the droplets can collect between touching dishes or inside recessed cup bottoms.
Check whether the rinse-aid dispenser is empty. Many homeowners fill it once, forget about it, and assume the product lasts forever. The dispenser usually releases a small amount during each cycle, so it eventually needs refilling. Make sure the cap closes securely and wipe away spills, because too much rinse aid can create streaking or foam.
Some dispensers have an adjustable setting. Start at a moderate level rather than immediately choosing the maximum. If dishes remain very wet or spotted, increase the setting gradually. If glassware develops bluish streaks or the machine produces unusual foam, reduce it. Changes may require several cycles before you can judge the result fairly.
Rinse aid becomes especially useful when you wash many plastic containers. Plastic does not hold heat as effectively as glass or ceramic, so evaporation happens more slowly. The product cannot change the material’s heat capacity, but it can help water drain away before the surface cools.
If every item remains soaking wet despite correct use, the problem probably goes beyond rinse aid. Look at water temperature, heating performance, venting, drainage, and loading. Think of rinse aid as the finishing touch on a healthy wash system. It improves a good process, but it cannot rescue one that is mechanically failing.

Mineral buildup can quietly reduce dishwasher performance over time. Depending on the water supply, household plumbing, water-heater condition, and any treatment system in the home, dissolved minerals may collect on spray openings, heating surfaces, filters, glassware, and the stainless or plastic walls of the tub. The buildup usually appears as white, gray, or chalky residue. Homeowners may mistake it for detergent, dried food, or permanent damage.
Minerals interfere with cleaning in several ways. They can narrow spray-arm holes, reducing water pressure. They can form a coating on internal surfaces and heating components. They may react with detergent and leave a cloudy film on glasses. When mineral deposits dry on dishes, the result can look dirty even when food and grease have been removed.
Start by examining the inside of the dishwasher. Check spray arms, the filter area, door edges, heating surfaces, and places where water frequently dries. If the residue wipes away with an appropriate mild cleaning method, mineral buildup is likely involved. Avoid using random chemicals or combining cleaning products. Some mixtures produce dangerous fumes, and harsh acids can damage seals, metal, or internal components.
Run a dishwasher-safe cleaning cycle using a method approved for the appliance’s materials and design. Clean removable parts separately when practical. If buildup returns quickly, the issue may require more than occasional cleaning. You may need to evaluate household water conditions, water-heater sediment, or treatment options suitable for the property. For more information about how mineral deposits can affect appliance performance, see how hard water damages dishwashers and washing machines.
Cloudy glassware requires careful interpretation. If the cloudiness disappears when cleaned by hand, it may be mineral film. If it remains permanently etched into the surface, repeated exposure to excessive detergent, very hot water, or aggressive cycles may have damaged the glass. Etching cannot be washed away.
Do not assume every white mark is caused by hard water. Undissolved detergent, poor rinsing, blocked spray arms, and overloading can produce similar signs. Treat mineral buildup as one piece of the diagnosis. Clean the machine, adjust detergent carefully, improve rinsing, and watch whether the next several loads show consistent improvement.

A dishwasher that cannot drain completely may wash dishes in dirty water and leave them wet when the cycle ends. Small amounts of clean water in certain internal areas can be normal, but a visible pool across the bottom of the tub, a foul smell, or water covering the filter suggests a drainage problem. The cause may be as simple as a clogged filter or as serious as a failing drain pump.
Begin by checking the filter and accessible drain area. Food, labels, glass, paper, grease, and broken plastic can obstruct water flow. Remove debris carefully and wear gloves, especially when you cannot clearly see what is below the water. Never reach toward moving parts while the machine is powered.
Next, inspect the drain hose where it is accessible. Look for kinks, crushing, sharp bends, loose connections, or a section pressed behind the dishwasher. Poor hose routing can slow drainage or allow wastewater to flow back toward the machine. The sink drain connection may also be blocked. If the kitchen sink drains slowly, the dishwasher may be affected by the same restriction.
Listen during the drain stage. A healthy system usually produces a steady pumping sound followed by water moving through the drain line. A loud hum without drainage may indicate a blockage or pump problem. Repeated starts and stops, grinding noises, or water returning after the cycle also deserve attention.
Dishwashers installed after kitchen remodeling sometimes develop drainage issues because a hose was routed incorrectly, a connection was not fully opened, or the line became pinched when the appliance was pushed into place. If problems began immediately after installation or plumbing work, inspect those conditions first.
Standing water should not be ignored. It creates odors, encourages residue buildup, and can leak if the water level rises unexpectedly. If basic cleaning and hose checks do not restore normal drainage, stop running repeated cycles. Continuing to operate the machine may overwork the pump or cause water damage. Professional dishwasher repair can help determine whether the restriction is inside the dishwasher, in the hose, or farther into the home’s drainage system.
When dishes are consistently wet and cool at the end of the cycle, the dishwasher may not be producing or retaining enough heat. Heat supports both cleaning and drying. It helps detergent work, loosens grease, warms the dishes, and encourages water to evaporate after rinsing. A failure in the heating system can therefore create dirty dishes and poor drying at the same time.
Run a normal cycle and pay attention to the final result. Are ceramic plates warm? Does a small amount of steam escape when the door opens shortly after completion? If everything feels cold, the heating function may be weak or inactive. The problem could involve a heating component, temperature sensor, control, wiring issue, or safety device. These repairs require careful testing and should not be guessed at.
Some dishwashers dry primarily through retained heat and condensation rather than an exposed heating component. In those machines, proper rinse aid, hot water, loading, and ventilation become especially important. Plastic will often remain wetter than glass or ceramic because it cools quickly. That is a material characteristic, not necessarily a failure.
Check cycle settings as well. Energy-saving, quick, or air-dry options may reduce heating to save power or shorten the cycle. If you accidentally selected a low-heat setting, the machine may be doing exactly what it was instructed to do. Compare the results with a full cycle that includes the normal drying option.
Do not immediately open the door when the cycle ends unless the machine’s instructions recommend it. Some systems need time for moisture to condense or vent properly. On the other hand, certain models dry better when the door is opened slightly after completion. The best practice depends on the design, but leaving wet dishes sealed inside for many hours can allow moisture to settle back onto surfaces.
Heating components operate around electricity and water, a combination that leaves little room for improvisation. If dishes stay cold after you have confirmed hot incoming water and correct settings, professional diagnosis is usually safer and more cost-effective than replacing parts at random.
A dishwasher door does more than keep water inside. It helps maintain pressure, heat, steam control, and the correct operating sequence. A damaged seal, clogged vent, or weak latch can create confusing symptoms, including poor drying, interrupted cycles, leaks, and inconsistent cleaning. Because the door still closes, homeowners often overlook these parts during troubleshooting.
Inspect the rubber or flexible seal around the opening. Look for food residue, grease, cracks, flattening, tears, or sections pulling away from the channel. Clean the seal gently with a soft cloth and mild solution appropriate for the material. Avoid sharp tools and harsh cleaners that can weaken the rubber. Pay special attention to the lower corners, where debris often collects.
A seal problem usually reveals itself through moisture around the door, streaks down nearby cabinets, or water on the floor. However, even a small leak can allow heat and steam to escape during the cycle. If the interior never becomes properly hot, drying may suffer.
Check the latch next. The door should close firmly and remain secure throughout the cycle. A loose latch, misaligned door, or worn strike can interrupt operation. Some machines may pause or stop heating when they detect that the door is not fully closed. If pushing on the door changes the sound of the machine or allows the cycle to continue, the latch deserves inspection.
The vent is another critical part of the drying process. It allows moist air to escape or supports the dishwasher’s condensation system. Grease, dust, residue, or a failed vent mechanism can trap humidity inside the tub. The dishes may be clean but remain covered with moisture.
Look for signs of vent trouble, such as unusual condensation around the control area, moisture beneath the counter, or a persistent humid smell after the cycle. Do not remove control panels unless you are qualified to work around electrical components. Clean only accessible surfaces and leave internal testing to a technician.
Door systems are easy to underestimate because they seem passive. In reality, a small problem at the front of the dishwasher can disrupt the pressure and temperature conditions throughout the entire machine.
Sometimes the dishwasher is only the messenger. The real problem may be in the home’s plumbing. A machine cannot clean properly if it receives too little water, fills too slowly, starts with cold water, or shares a restricted supply line. Cleveland’s housing stock includes homes with very different plumbing ages and layouts, so two identical dishwashers can perform differently depending on where and how they are installed. Homeowners dealing with these conditions may also find our guide to appliance problems in older Cleveland homes helpful.
Pay attention to the fill stage. Shortly after the dishwasher starts, you should hear water entering the tub. If the sound is weak, brief, or unusual, the machine may not be receiving enough water. A partially closed shutoff valve, kinked supply line, clogged inlet screen, low household pressure, or failing inlet component can reduce the fill level.
Check other fixtures. Does the kitchen faucet have noticeably low pressure? Does water flow change dramatically when someone uses a shower, washing machine, or another sink? These patterns may point to a household supply issue. If low pressure affects several fixtures, a plumber may be more appropriate than an appliance technician.
Long hot-water runs create another challenge. When the dishwasher is far from the water heater, the first fill may consist mostly of water that cooled inside the pipes. Running the kitchen faucet until hot water arrives can reduce that problem. Insulation, plumbing design, and water-heater performance may also influence how quickly heat reaches the machine.
Older pipes can develop internal restriction from corrosion or mineral buildup. A valve may appear open while allowing only limited flow. Flexible lines can become pinched during installation. Even a small reduction in water volume can weaken spray pressure and leave detergent undissolved.
Watch for changes over time. If the dishwasher worked well for years and suddenly began leaving dirty dishes, a new plumbing restriction, valve problem, or supply issue is possible. If performance was poor from the first day of installation, review the line routing, valve position, drain setup, and hot-water availability.
Treat the dishwasher and plumbing as connected systems. Fixing the appliance without correcting the supply problem may produce only temporary improvement.
Random troubleshooting wastes time because changing several things at once makes it impossible to identify the real cause. A better approach moves from the simplest, safest, and least expensive checks toward deeper mechanical issues. Keep notes after each test load so you can see what changed.
Change one major factor at a time whenever possible. If cleaning the filter solves the issue, you have your answer. If several basic checks fail, the remaining evidence will help a technician diagnose the machine faster. Good troubleshooting is not about taking the dishwasher apart. It is about narrowing the possibilities with clear observations.
Not every dishwasher problem requires replacement, and not every aging machine deserves another expensive repair. The right decision depends on the appliance’s age, condition, repair history, installation quality, and the cost of a reliable fix. A clogged filter, blocked spray arm, loose hose, worn seal, or simple latch issue may be inexpensive to correct. A major pump, control, wiring, structural, or repeated heating problem may require a more careful cost comparison.
| Situation | Repair May Make Sense | Replacement May Make Sense |
|---|---|---|
| Appliance age | Relatively recent with limited wear | Older with several worn systems |
| Repair history | First significant problem | Multiple repairs in a short period |
| Physical condition | Clean tub, solid racks, intact door | Rust, cracks, leaks, damaged interior |
| Cost | Modest compared with replacement | Large share of installed replacement cost |
| Reliability | One clearly diagnosed failure | Several symptoms with uncertain causes |
| Installation | Existing setup is safe and correct | Current installation needs major correction |
Include the complete cost when comparing options. A replacement price may not include delivery, removal, installation, plumbing adjustments, electrical work, cabinet modifications, or floor protection. A repair estimate may not include a second visit or additional parts discovered after disassembly. Ask for an itemized explanation whenever possible.
Repeated failure is a warning sign. If the dishwasher has already needed several repairs and still produces inconsistent results, another fix may only postpone replacement. On the other hand, replacing a machine because of a dirty filter or blocked hose is unnecessary. For a broader comparison of the factors involved, see Should You Repair or Replace an Appliance?.
Safety changes the equation. Active leaks, scorched connections, damaged wiring, repeated breaker trips, severe overheating, or structural deterioration should not be handled with temporary patches. Shut the machine down and arrange professional service.
A good technician should explain what failed, whether related components show wear, and how confident they are that the repair will restore dependable performance. The cheapest invoice is not always the best value. You are paying for clean dishes, reliable operation, and protection from water damage—not simply for a machine that turns on.
Once the dishwasher is working properly again, a few simple habits can keep the problem from returning. Start with regular filter cleaning. You do not need to wait until the machine smells bad or leaves food on the glasses. Inspect the filter often enough to understand how quickly debris builds up in your household. Homes that cook frequently or run daily loads may need more attention.
Scrape off large food pieces before loading, but avoid turning pre-rinsing into hand-washing. The dishwasher should handle normal residue. Remove bones, fruit pits, paper labels, toothpicks, thick grease, and anything likely to clog the filter or pump. These materials do not dissolve simply because they spend two hours in hot water.
Load for water access, not maximum capacity. Leave space between plates, angle bowls and cups downward, secure lightweight plastic, and check spray-arm rotation before starting. Keep oversized cookware away from the detergent dispenser and main water paths.
Use fresh detergent and store it in a dry location. Refill rinse aid as needed, especially when water spots or poor drying return. Run the kitchen faucet until hot before starting the dishwasher when the hot-water line is long.
Clean mineral residue before it becomes a thick coating. Watch spray holes, heating surfaces, door edges, and the filter area. Use cleaning methods appropriate for the machine’s materials and never mix chemical products.
After the cycle, unload the lower rack last. Water trapped on upper dishes can drip onto items below when the upper rack is moved first. Give plastic a little extra time to dry or shake off recessed surfaces before unloading.
Listen to the dishwasher during normal operation. Changes in sound are often early warnings. Grinding, repeated clicking, weak spraying, prolonged draining, or unusual humming may appear before complete failure. Investigating those changes early can prevent larger repairs.
The best maintenance routine is the one you will actually follow. A quick monthly inspection of the filter, spray arms, seals, and detergent area can prevent many of the issues that make homeowners believe the dishwasher is worn out.
A dishwasher that leaves dishes wet or dirty is frustrating, but the problem often begins with something surprisingly ordinary. Crowded racks, blocked spray arms, cool incoming water, a dirty filter, old detergent, low rinse aid, mineral buildup, or poor drainage can all weaken performance. The machine may continue running through every stage, giving the impression that it is mechanically healthy, while the dishes tell a different story.
Start with the basics because they solve the highest number of problems at the lowest cost. Rearrange the load, spin the spray arms, run hot water at the sink, clean the filter, check the dispenser, and inspect the drain area. Then run a controlled test cycle rather than loading every dirty item in the kitchen. That gives you a fair way to judge whether the changes worked.
Patterns matter. Dirty dishes concentrated on one rack suggest a spray problem. Grit on glasses often points to filtration or drainage. Cool, wet dishes may indicate weak heating. Standing water suggests a drain restriction. Cloudy surfaces may come from detergent, minerals, or both. Once you connect the symptom to the part of the wash process that failed, troubleshooting becomes much easier.
Cleveland homeowners should also consider the house around the appliance. Long hot-water runs, older valves, restricted supply lines, low pressure, slow drains, and installation issues can all make a healthy dishwasher perform poorly. Replacing the machine without fixing those conditions may deliver the same disappointing result.
Know when to stop troubleshooting. Electrical problems, repeated breaker trips, active leaks, burning smells, major pump failures, and persistent heating issues belong in professional hands. When these symptoms appear, professional dishwasher repair can identify the cause without relying on guesswork.
Clean dishes come from the entire system working together: hot water, adequate pressure, correct detergent, open spray paths, effective filtration, complete drainage, and controlled drying. Improve those conditions one by one, and your dishwasher will usually return to doing what it was installed to do.
We repair a wide range of household appliances including refrigerators, washers, dryers, ovens, dishwashers, and more. No matter the brand or model, our experienced technicians are ready to help. We repair commercial appliances as well: commercial washers dryers, commercial refrigerators & freezer & more.
We service a wide range of household appliances, including refrigerators, dryers, washers, ranges, cooktops, dishwashers, freezers, ice makers, ovens, and double ovens. Our technicians operate across many locations in Ohio, covering major cities like Cleveland, Akron, and Parma. We also serve surrounding areas including Lakewood, Westlake, Strongsville, and Brooklyn. Our service area extends to Rocky River, Euclid, Solon, Beachwood, and Cleveland Heights, as well as counties such as Cuyahoga, Lorain, Lake, and Medina. Additional cities we cover include North-Olmsted, North Ridgeville, Valley-City, Lorain, Avon Lake, Richfield, Brecksville, Garfield Heights, Seven Hills, Brunswick, Oakwood, Mentor, and Willoughby.


